Achieving long, voluminous lashes has always been a beauty goal of mine. While I used to rely on strip lashes to add volume and length, the daily struggle of applying them was exhausting and time-consuming. The constant need to apply them every morning started to feel like a chore, especially when I was looking for a more efficient, long-lasting solution. That’s when I stumbled upon the Nanolash Lash Lift Kit. Intrigued by the promises of a salon-like effect right at home, I decided to give it a try. The result? In under 30 minutes, I managed to achieve stunning lashes that lasted for weeks. Here’s how I did it.
What Are Lash Lift and Lamination?
If you’re new to the concept of DIY lash lift, you might be wondering what all the hype is about. Lash lift and lamination are professional treatments designed to enhance the natural beauty of your lashes. Instead of relying on extensions or falsies, a lash lift curls and shapes your lashes while giving them a fuller, longer look. This treatment also helps to nourish and restore lashes, making them healthier and more defined.
In recent years, lash lift and lamination have become incredibly popular. More and more beauty salons are offering them, and it’s no surprise given the amazing results they deliver. I have always admired women who had perfect lashes after the lash lift, and after seeing the dramatic transformation, I couldn’t help but feel envious of their stunning lashes.
What makes lash lamination so appealing is that it provides a natural look without any heaviness or excessive products. Your lashes appear longer, thicker, and beautifully curled, all while remaining healthy and strong.
Why I Chose Nanolash Lash Lift Kit
Given my busy schedule, finding time to visit a beauty salon for a lash lift seemed nearly impossible. So, when I began researching at-home alternatives, I was thrilled to discover the Nanolash Lash Lift Kit. This product promised to offer salon-quality results in the comfort of my own home, and the best part? The effect could last up to eight weeks!
The promise of professional results in a short amount of time was too good to resist, so I decided to order the kit and see for myself.
What’s Inside the Nanolash Lash Lift Kit?
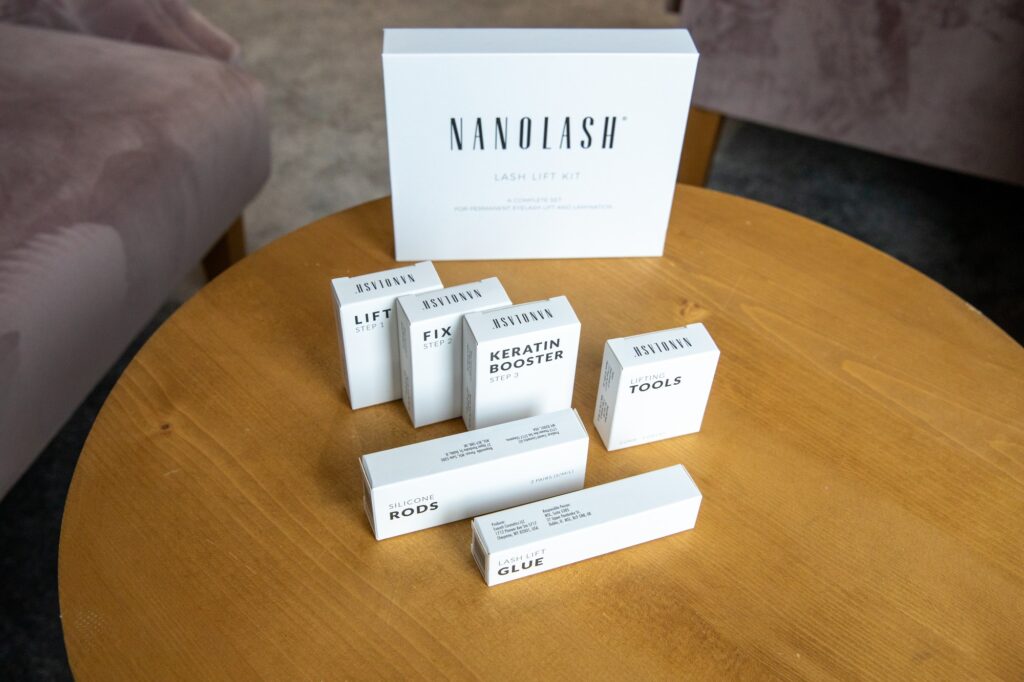
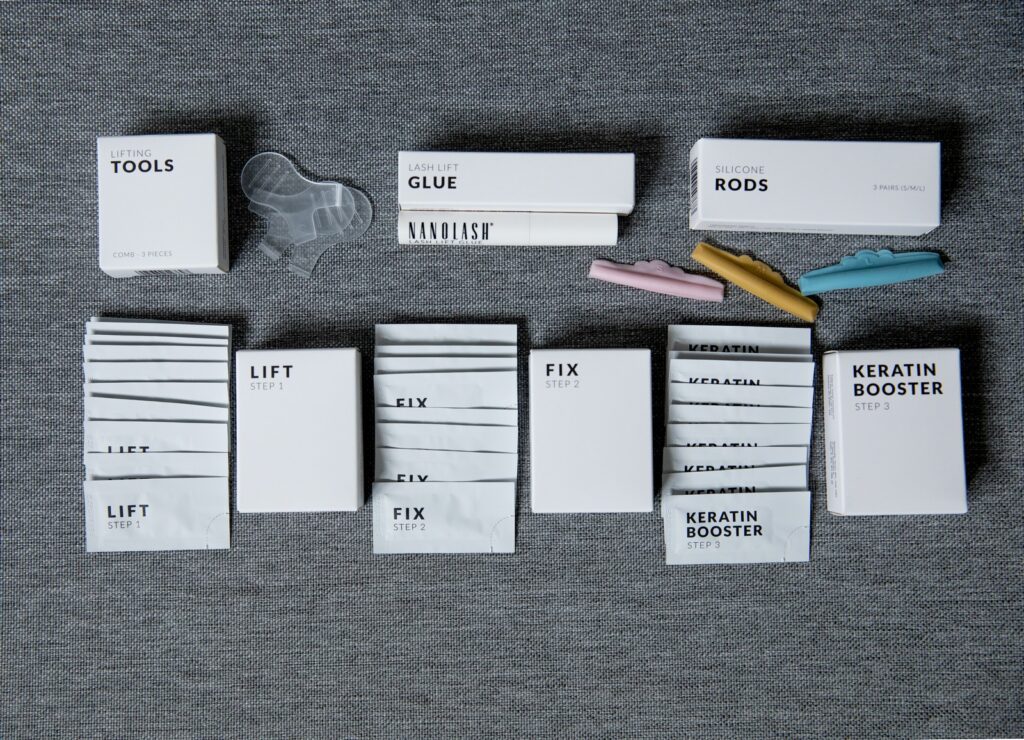
When my Nanolash Lash Lift Kit arrived, I was eager to dive in. As expected from a brand that prides itself on high-quality products, the kit didn’t disappoint. Inside, I found everything I needed to perform the lash lift and lamination treatment at home:
- Three key formulas: Step 1 (Lift), Step 2 (Fix), and Step 3 (Keratin Booster).
- Three pairs of high-quality silicone rods in various sizes.
- Lash Lift Glue (5 ml), used to secure the rods to your eyelids.
- Other essential accessories to ensure an easy, hassle-free at-home treatment.
One of the things I appreciated most about the kit is that the formulas come in individual sachets. Each sachet contains 0.5 milliliters of product, and there are 30 sachets in total. This means the kit is good for up to 10 DIY lash treatments, giving you plenty of chances to perfect your lash lift skills!
What surprised me most was the nourishing properties of the formulas. They contain ingredients like Abyssinian oil, coconut oil, and grape seed oil – known for their ability to regenerate and strengthen the lashes, leaving them soft and healthy.
How I Used the Nanolash Lash Lift Kit
The entire process of using the Nanolash Lash Lift Kit was straightforward and surprisingly quick. Here’s a step-by-step breakdown of what I did:
- Preparation: The first step was removing any mascara and makeup from my lashes.
- Rod Application: I chose the appropriate size silicone rod and carefully attached it to my eyelid with the lash lift glue. This step is crucial because the rod determines the curl of your lashes. I started with one eye at a time to ensure precision.
- Applying the Products: I then moved on to the three formulas, applying them as instructed.
- Finishing Touches: After applying each product and waiting the necessary amount of time, I carefully removed the silicone rod and cleaned off any remaining product.
The Results: Beautiful Lashes in Less Than 30 Minutes
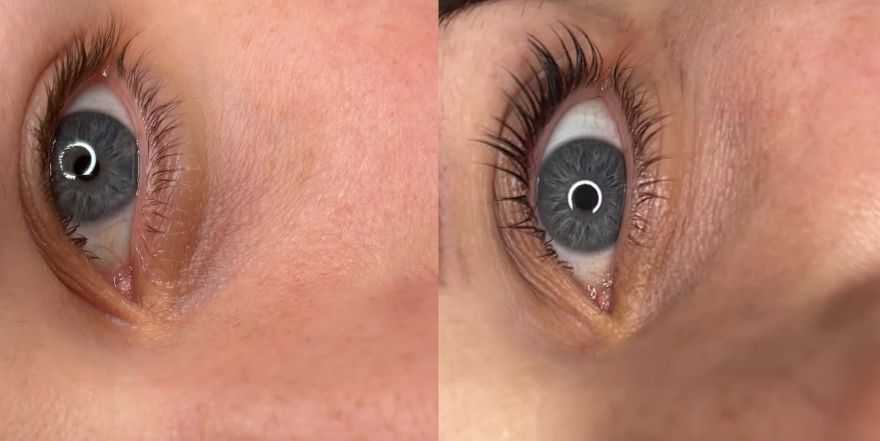
The results of using the Nanolash Lash Lift Kit were nothing short of amazing. My lashes were visibly longer, thicker, and perfectly curled. I was thrilled to see how much more defined they looked – like I had just walked out of a salon with freshly lifted lashes.
The most surprising part was how much softer my lashes felt after the treatment. They seemed more pliable and responsive to styling. The overall condition of my lashes had improved, and they looked healthier than before.
The best part? The effects lasted for weeks. Even after eight weeks, my lashes still had a noticeable curl and volume, which meant I didn’t have to spend time each day curling them or applying falsies.
Final Thoughts: Is Nanolash Lash Lift Kit Worth It?
If you’re someone who wants to enhance your lashes but doesn’t have the time or desire to visit a beauty salon, the Nanolash Lash Lift Kit is a game-changer. It’s easy to use, delivers salon-quality results, and can be done in the comfort of your own home. Plus, the results last up to eight weeks, so you’ll save time and effort in the long run.
Whether you’re looking to restore your lashes or simply want a natural, long-lasting lift, the Nanolash Lash Lift Kit has you covered. If you’ve been considering the lash lift but haven’t found the right solution, I highly recommend giving it a try – you won’t be disappointed!
